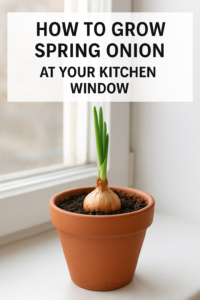
Spring onions (also known as green onions) are one of the easiest and most rewarding vegetables to grow at home. You don’t need a large garden — just a sunny kitchen window, a few onion bulbs, and a little care. With minimal effort, you can enjoy fresh, crisp, and flavorful green stalks for garnishing your dishes year-round.
In this blog, we’ll guide you step by step on how to grow spring onions from onion bulbs at your kitchen window — even if you’re a beginner!
🧅 Why Grow Spring Onions at Home?
Growing spring onions indoors offers many benefits:
-
🌱 Fresh supply: Always have greens ready for salads, soups, and curries.
-
💰 Budget-friendly: Save money by regrowing onions instead of buying repeatedly.
-
🌞 Space-saving: Perfect for small spaces or apartment kitchens.
-
🌿 Chemical-free: Enjoy pesticide-free, organic greens.
Materials You’ll Need
To start your mini kitchen garden, gather these simple items:
-
Healthy onion bulbs (not sprouted too much but with visible green tips)
-
A small pot or container with drainage holes
-
Potting mix or garden soil mixed with compost
-
A watering can or spray bottle
-
Sunny kitchen window or balcony ledge
🌼 Step-by-Step Guide to Growing Spring Onion Indoors
Step 1: Select the Right Bulbs
Choose small to medium-sized onion bulbs that are firm, not mushy. You can even use the ones already sprouting in your kitchen — nature has already started the job for you!
Step 2: Prepare the Pot or Container
Fill your pot with nutrient-rich potting mix. Mix equal parts of garden soil, compost, and sand for good drainage. Spring onions prefer loose, airy soil.
Step 3: Plant the Bulbs
-
Place each bulb with the root side down and the sprout side up.
-
Keep half of the bulb exposed above the soil surface.
-
Space bulbs about 2 inches apart if you’re planting multiple in a pot.
Step 4: Water Gently
Lightly water the soil until it feels moist but not soggy. Overwatering can cause bulb rot. Use a spray bottle for gentle watering every two days.
Step 5: Provide Sunlight
Keep the pot near a sunny kitchen window where it can receive 4–6 hours of sunlight daily. Spring onions love light — the greener the leaves, the healthier the plant!
Step 6: Harvesting
In 10–14 days, you’ll see long green shoots. Once they reach about 6–8 inches, you can start harvesting.
✂️ Cut the greens about 1 inch above the bulb — they’ll regrow again within a week!

🌿 Bonus Tip: Grow Spring Onion in Water
You can also grow spring onions hydroponically — without soil!
-
Take a glass jar and fill it halfway with clean water.
-
Place onion bulbs with roots touching the water.
-
Change the water every 2–3 days.
-
Watch the greens regrow continuously!
This is a beautiful, decorative, and eco-friendly way to add life to your kitchen window.
🧡 Homemade Fertilizer Tip
Feed your spring onions with homemade compost tea or diluted kitchen waste water (like rice water or vegetable rinse water). These natural nutrients boost growth and make the leaves greener and more flavorful.
🌱 Final Thoughts
Growing spring onions from onion bulbs is a simple and fun gardening activity that anyone can do — even in the smallest of spaces. It’s eco-friendly, cost-effective, and gives you a constant supply of fresh greens right at your kitchen window.
So next time your onion bulbs start sprouting — don’t throw them away. Plant them, nurture them, and enjoy your homegrown spring onions in just a couple of weeks! 🌿
